
Ever dabbled in the art of long exposure photography? It’s where you let your camera drink in light over an extended period. You capture the world in a way your eyes never could. This technique transforms bustling streets into ghostly trails and waterfalls into silky veils.
With a mirrorless camera, long exposure shots become even more exciting. This article is packed with answers, tips, and examples to elevate your mirrorless camera long exposure game.
Essential Equipment for long exposures
Camera
Starting with the sensor size and resolution, bigger is better. A large sensor and high megapixels, such as those in the Sony A7R IV, ensure top-notch image quality. They also provide an impressive dynamic range. This is crucial for shadowy dusk shots or bright coastal scenes.
ISO performance is another game-changer. A camera like the Nikon Z7 II has superior ISO capabilities for noise reduction. It will give you crystal-clear night sky photos with minimal grain. But let’s not forget about those shaky hands. In-body image stabilization (IBIS) comes into play there. Marvels like the Canon EOS R5 have got your back. They counter any unintentional camera movement.
For framing the perfect shot, live view and the electronic viewfinder (EVF) are your best pals. These allow you to preview the exposure in real-time, reducing the guesswork. And with focus peaking and magnification, you’re looking at impeccably focused manual shots. Throw in a silent shutter or mirror lock-up, like those in the Fujifilm GFX 100S. You’re all set to eliminate those pesky vibrations.
Lastly, don’t overlook the bulb mode and exposure bracketing features. They let you stretch those exposures as long as you like. You can blend various shots for the ideal exposure, much like the Panasonic Lumix S1R.
Tripod
You’ve got your mirrorless camera ready. But where is it going to stand during those long exposures? That’s right, on a tripod, and not just any tripod. You need something sturdy and reliable, much like the Manfrotto 055 Carbon Fiber. This guy won’t wobble when it’s windy. When it comes to weight and size, you’ll appreciate a lighter, compact tripod, such as the Vanguard Alta Pro 2+ 263CT. This is especially true when you’re hiking to that impeccable vantage point.
Height and load capacity matter too. You wouldn’t want your camera to be nose-diving mid-shot. A tripod like the Gitzo Mountaineer Series 2 has ample height and robust load capacity. It will keep your setup secure. The leg sections and locks should be simple. You don’t want to fumble with them when the lighting is just right, do you? The Benro Mach3 TMA38CL has you covered.
Then there’s the head type. The MeFOTO RoadTrip S has a flexible head that gives you creative control over your angles and shots. It turns a good photo into a great one.
Lenses
Your trusty mirrorless camera adventure wouldn’t be complete without the right set of lenses. You need them for long exposure. A wide-angle lens will let you engulf the entire landscape into your frame. With ranges like 14mm to 35mm and views up to 120°, the Sony FE 16-35mm f/2.8 GM is hard to beat. But if you’re after intricate details or compressed perspectives, you’ll want a telephoto lens in your bag. Something like the Panasonic Lumix S PRO 70-200mm f/4 O.I.S.
Prime lenses are your goto when sharpness is key. Their large apertures, like f/1.4, make them perfect for low-light and creating that dreamy bokeh. Cue lenses like the Nikon Z 24-70mm f/2.8 S. Sometimes though, you’ve gotta zoom to capture the scene just right. A versatile zoom lens with a varied focal length will be your best friend, just like the Canon RF 15-35mm f/2.8L IS USM.
Neutral Density Filter
Imagine smoothing out waves into a misty wonderland. Or turning those busy city lights into ribbons of color. That’s the magic of a neutral density filter. It’s like sunglasses for your camera, cutting down the light, measured in stops. Take the Lee Filters Big Stopper. It’ll grant you those silky waterfalls without overexposure. Fancy a bit more flexibility? A B+W XS-Pro ND Vario MRC-Nano with variable ND could be just what you’re looking for.
Remote Shutter Release
Lastly, a remote shutter release is like having a little magic wand for your camera. It ensures you aren’t nudging your setup right at the critical moment. Having one means sharp, clear shots every time. A Nikon MC-DC2 is wired, while a Canon BR-E1 is wireless. If you’re planning to lock your shutter open for the stars, a remote with a lock function is a must-have in your camera bag. Consider the Sony RM-VPR1.
Setting Up for the Shot
Framing and Composition
Find Balance With the Rule of Thirds
When you’re diving into the art of long exposure, your mirrorless camera is your ticket to creating ethereal images that tell a story. Start by using the rule of thirds to balance your shots. Imagine dividing your frame into a grid of nine squares. Now, place your subject along the lines or at their intersections. This simple technique can transform an ordinary scene into a captivating visual narrative.
Lead the Viewer’s Eye
Your next step is to craft depth and direction. Leading lines, be they the edges of a street or the curves of a coastline, pull viewers into the scene. Similarly, repeating patterns can give a sense of rhythm to a place. It seems frozen in the extended moment that long exposure offers.
Layer Your Composition
To add complexity, think in layers. A rock is in the foreground. The ebb and flow of the tides is in the middle ground. A distant mountain range in the background creates an almost 3D effect in your shots. Each element contributes to a sense of scale and context. This is especially true when capturing landscapes with your trusty wide-angle lens.
Focusing Techniques
In the world of long exposure photography, a sharp focus is the hero. Your mirrorless camera’s peaking and magnification features are the trusty sidekicks. Low-light situations are no joke; they can really test your nerves (and your camera’s limits). Against these odds, you’ll want to take back control. Use manual focus to keep your image sharp where it counts.
Zoom in with your camera’s live view or EVF and get personal with those details. Then lock that focus in with a back button or by switching to manual. This way, your camera’s autofocus won’t go on a wild goose chase. If you’re feeling fancy, try hyperfocal distance. Or, try focus stacking to snag detail from front to back like a pro.
Aperture Settings
Your aperture isn’t just a hole in your lens; it’s a portal to artistic expression. It shapes the light, giving you the power to control how much of your scene is in focus. Find that sweet spot, usually between f/8 and f/16. It will get everything in razor-sharp detail, just the thing for landscapes that pack a punch.
Craving some background blur? Wider apertures like f/4 can help you isolate subjects with smooth, creamy bokeh. Or go small with f/18 or higher to get a starburst that makes city lights dance. Just keep in mind that lenses have personalities too. They’ll behave differently with various aperture settings.
ISO Adjustment
Consider ISO your ally in the balancing act of long exposure photography. It’s all about keeping noise down and details crisp. Your mirrorless camera’s ISO can be your knight in shining armor. It can help prevent the dreaded camera shake. It can also help you achieve a faster shutter speed.
But the golden rule? Keep it as low as possible. Sometimes, you’ll need to push it a bit. Maybe to ISO 400 or 800, to keep things sharp as a tack without introducing the cringe-worthy noise. And don’t forget, your camera’s live view can show you just how the ISO is playing out in real-time.
Shutter Speed and Bulb Mode
Here’s where the magic happens: shutter speed. It’s the gatekeeper of time in your images. Want to turn that waterfall into a smooth white veil? Go long, think 10 seconds or more. After the hustle and bustle of city lights whipping into smooth ribbons? You got it. For those moments when the camera’s own limits won’t cut it, there’s bulb mode. Here, you call the shots on exposure time.
No matter the case, keep in touch with your live view—your window to what’s unfolding. And always remember to ward off camera shake with a remote shutter release. You can also use the camera’s self-timer. Your viewers will thank you for those tack-sharp stars in the night sky.
Using Histograms for Exposure Check
Histograms might look like mountain ranges. But, they’re really your best buds in assessing exposure. Across the peaks and valleys of these graphs, you can track the exposure and the dynamic range of your scene. You’re aiming for a smooth hill that doesn’t skew too far one way or the other.
To nail that long exposure shot with your mirrorless camera, keep an eye on those histograms in live view. They give you a heads-up if you’re losing details in the dark abyss of shadows or the bright white of highlights. Tweak and tune with exposure compensation. Use bracketing for an image that’s just right. It shouldn’t be too dark or too bright.
Adding ND Filters
When the world is too bright for that serene long exposure, ND filters are your dimming switch. They cut down the light. This lets you stretch those shutter speeds without getting washed out. Choose fixed for consistency or variable for flexibility. Either way, they’re your ticket to that ethereal look in daylight. They won’t overexpose you.
To play it like a symphony, set everything up. This includes the camera, composition, and focus. Do this before attaching that filter. Then slip on the ND and tweak your settings. Keep an eye on your EVF to manage that exposure and watch out for any color cast creeping in. It’s like putting on sunglasses for your camera. It’s just the thing for when the light gets too bright. You want to capture the world in a smooth, dreamlike state.
Techniques and Tips for Long Exposure Photography
Long Exposure Photography in Different Scenarios
Waterfalls
You want the water to look like a flowing veil, right? Then, consider these tips:
- Timing Matters: Try early morning or late afternoon when the light is soft.
- Angles and Perspectives: Move around to find unique vantage points.
- Filter it Out: A polarizing filter can work wonders by cutting the glare and making those colors pop.
- ND Filters for Silkiness: A variable ND filter will be your best friend to achieve that creamy water texture.
- Shutter Speed: Slow it down. A range from 1/4 to even 2 seconds should do the trick to capture flow while maintaining water texture.
- Aperture for Depth: Aim for f/11 or f/16 for that perfect deep depth of field.
- Live View is Your Preview: Your mirrorless camera’s EVF or live view lets you adjust on the fly.
- Histogram for Perfect Exposure: No more guesswork. Watch that histogram or tweak the exposure compensation to avoid those blown-out highlights.
- Manual Focus Mastery: Fine-tune your focus manually. Magnify or use focus peaking for precision.
- Stability Is Crucial: Reduce camera shake with a self-timer or remote shutter.
Clouds
Cloud formations can be spellbinding with long exposure. Want to create an ethereal skyscape?
- Time Your Shot: Prefer dynamic skies? Capture right before a storm or as the weather shifts.
- Composition and Angle: Elevate your perspective; high points can offer a compelling composition.
- GND Filters for Balance: To manage those bright skies, a graduated ND filter helps retain detail.
- Dreamy Clouds: To capture clouds that flow like rivers, use shutter speeds of 30 seconds to 5 minutes.
- Small Aperture for Sharpness: Again, an f/11 or higher will keep everything in focus.
- The Preview Dance: Use live view or the EVF to make sure you like what you see before capturing.
- Histogram and Exposure: Keep those clouds from washing out by monitoring your exposure.
- Focus with Precision: Manual focus with peaking or magnification helps you define those clouds.
- Shake-Free Clouds: A sturdy tripod plus a remote release assures a calm camera for that long wait.
Seascapes
Finally, the dance of the sea with a long exposure is nothing short of poetic. Craving that serene seascape?
- The Perfect Time: Twilight? Golden hour? Blue hour? Each carries its unique mood.
- Angle and Position: High cliffs or down close to the surf? Discover your seascape’s essence.
- Polarizing for Perfection: A circular polarizer minimizes the reflections and gives you true colors.
- GND Filters for Drama: Use a GND to tame the sky while keeping the sea properly exposed.
- ND Filters and Shutter Speed: Long shutter speeds, like 10 seconds to even 5 minutes, will make your water look smooth.
- Aperture for Details: Small apertures like f/16 ensure end-to-end clarity.
- Live View for Real-Time Adjusts: It’s like a crystal ball for photographers. Adjust as needed.
Motion Blur, Silky Water, and Light Painting
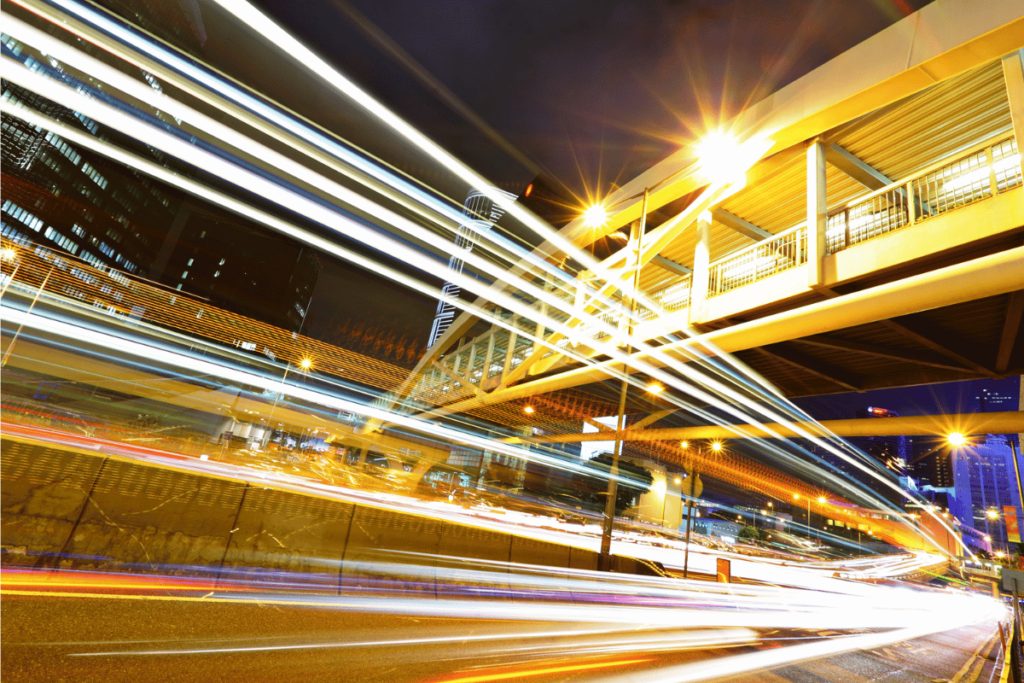
Mastering motion blur is akin to orchestrating a symphony. Set your mirrorless camera to a leisurely shutter speed, around 1/15 or 1/30. It can capture the ballet of a bustling city’s traffic. It can also capture the graceful sweep of a passing train.
Silky water is another realm where long exposures create fairy-tale-like streams and oceans. Imagine water so transparent it looks like flowing glass. Achieve this by setting your shutter to linger for 10 seconds or more. Throw a ND filter into the mix, and the water’s every detail sings in a silky harmony.
Then there’s the fantastical art of light painting. The method here is to let your camera’s shutter stay open for ages, say 30 seconds or longer. This technique brings fireworks to vibrant life. It makes stars trail across the sky. It transforms simple lanterns into luminous specters.
Workflow and Exposure Calculation
To work your camera like a pro, measure the ambient light with a light meter or an exposure calculator app. Learn the ins and outs of the exposure triangle and the reciprocal rule. The live view or the electronic viewfinder of your mirrorless camera is your trusty ally. It lets you preview and tweak the exposure in real-time. Don’t forget the histogram and exposure compensation features. Use them to ensure you’ve hit the target.
Common Mistakes in Long Exposure Photography
#1 – Vibration Reduction System Set to ON
You’re out, tripod ready, capturing that silky-smooth waterfall. But, your photos come out soft. Guess what? You left your mirrorless camera’s image stabilization on! It seems counterintuitive, but Vibration Reduction (VR) or Image Stabilization (IS) systems are notorious for introducing blur during long exposures. They’re designed for hand-held photography, compensating for your movements.
They don’t work when you’re as still as a statue with your camera on a tripod. To get that tack-sharp image, always ensure VR or IS is turned off before you start your shoot. Dive into your camera menu or give the lens switch a flick—it’s that simple. If your camera has In-Body Image Stabilization (IBIS), use it sparingly. Only use IBIS if it’s designed to detect tripod use.
#2 – Forgetting to Use Mirror Lock-up
Here’s a shocker: Your mirrorless camera doesn’t have a mirror to lock up! But if we’re talking DSLRs, the mirror slap can be the culprit behind that subtle blur in your starscape. The mirror lock-up feature lifts the mirror before the shutter opens. This minimizes vibrations. It’s all in the camera manual or the menu. Before you press the shutter, engage this mode. Then, use a self-timer or remote shutter release to avoid touching the camera. Even a gentle touch could ruin the shot.
#3 – Not Using a GND Filter Due to Cost
Ever faced that heartbreak when half your long exposure shot is perfectly exposed, and the other half is not even close? A Graduated Neutral Density (GND) filter is your savior. Don’t let the price tag stop you; it’s an investment in balanced exposure and dynamic range. The savvy move is to choose a quality GND filter that matches your budget and fits your lens size.
Choose a square or rectangular shape, or a soft or hard edge, to suit your scene’s horizon. Your mirrorless camera’s live view or EVF is perfect for aligning the filter just right. A good GND filter is like putting the finishing touches on a masterpiece—it makes all the difference.
#4 – Setting Aperture to f/22 for Longer Exposure
Everyone wants that longer exposure time, but cranking your aperture to f/22? You’ve invited diffraction to the party, and it’s a total buzzkill for image quality. Instead, cozy up to your lens’s sweet spot—typically between f/8 and f/16—where sharpness and depth of field are in top form.
Need that dreamy bokeh or out to capture a starburst effect? Adjust your aperture to the lower or higher end, respectively. Peek through your mirrorless camera’s live view or EVF. You’ll nail the exposure without any diffraction chaos.
#5 – Forgetting to Adjust ISO
Neglecting ISO in long exposure photography is like forgetting the sugar in your cookies. Something’s just not right. Whether it’s a peaceful night sky or a dynamic urban landscape, using the lowest ISO will grant you the cleanest shots. But hey, don’t shy away from bumping up the ISO a tad if you need a faster shutter or a narrower aperture. Some mirrorless cameras offer an ‘auto ISO’ feature. It’s handy when you want the camera to sweat the small stuff. Always double-check the live view or EVF. Ensure you’re cooking up the perfect exposure recipe with minimal noise.
#6 – Shooting as if in a Studio
Translating studio perfection to the great outdoors is a tall order. This is especially true with long exposure photography. Outdoor elements don’t always follow your script. Be a scout. Plan your shoot and prep for the conditions. Always have a Plan B. Shake things up with different angles and compositions. Then, review and refine your shots after each exposure. Stay nimble and adapt—it’ll make your work stand out.
#7 – Choosing Low-Quality Filters
We all love a bargain, but going cheap on filters is like pouring ketchup on a gourmet steak. It just spoils everything. Low-quality filters can bring unwelcome guests like loss of sharpness and color casts. Your best bet? Invest in filters from trusted brands. Check compatibility with your lens size and holder. Always opt for neutral-colored filters with minimal color shift. Use the live view or EVF of your mirrorless camera. You can see exactly what you’re getting and avoid unwanted surprises in your final image.
#8 – Underestimating Wind Effects
Ever tried setting up for the perfect long exposure only to have the wind play foul? Sturdy tripods and weight bags anchor you down amidst gusts. They safeguard against the dreaded shake. Protect your lens with a hood to reduce wind-related risks. Also, remember, your remote shutter release can stabilize your camera in breezy conditions.
#9 – Not Covering the Viewfinder
In the world of long exposure, an uncovered viewfinder can be the Achilles’ heel. It invites pesky light leaks. You can use a specialized cover, black tape, or a makeshift cloth to quickly maintain the integrity of your shot. Mirrorless cameras won’t have this problem. However, it’s a good habit to remember when switching up your gear.
#10 – Misplaced Trust in Filter Vendors
Filter vendors often promise the world. Relying solely on their word is like trusting that one weather forecast. It swore it wouldn’t rain on your outdoor wedding. Test the filter yourself. Use your mirrorless camera’s histogram or exposure compensation to tweak as needed. Always preview the effects live. Trust but verify—that’s your mantra for combating filter fiascos.
How to edit and post-process long exposure photos with a mirrorless camera?
Embrace the Power of RAW
Shooting long exposure photos in RAW format with your mirrorless camera unlocks a whole new world of potential. RAW files are like digital negatives. They contain a wealth of data that can be manipulated during post-processing.
You’ll have more control and flexibility over crucial elements. These include exposure, white balance, colors, and fine details. Dedicated editing software, such as Adobe Lightroom or Photoshop, becomes your playground. You can unleash your creativity here without the limitations you’d face with JPEGs.
Your Post-processing Roadmap
When you’ve got your perfect long exposure shot, it’s time to polish it in post. There’s a general workflow that can help you enhance those dreamy streaks of light. It can also help you smooth out water vistas.
- Crop and Straighten: Kick things off by framing your subject just right and get those horizons level.
- Exposure Tweaks: Dive into tweaking the exposure, contrast, highlights, and shadows. Refine the image’s overall balance.
- Color Control: Adjust white balance, saturation, vibrance, and hue to enhance the mood of your photo.
- Detailing: Sharpen to bring out those crisp edges. Reduce noise to clean up any graininess. Smooth out your image for a polished look.
- The Final Flourish: Apply filters, presets, or adjustment layers. Add that special touch or correct any lingering imperfections.
Tailoring Your Style
A mirrorless camera, paired with long exposure techniques, can create unique styles. Post-processing is where you fine-tune that signature look. Here’s a quick guide to help you channel your vision:
- For Realism: Keep adjustments minimal for a look that stays true to life. Over-processing is a no-go here; subtlety is your friend.
- For Drama: Crank up the contrast and saturation to give your images a punch of surrealism.
- For Monochrome Magic: Convert the image to black and white. Play with the tonal range and clarity to evoke emotions that only grayscale can.
- Unleash Your Artistry: Get experimental with a double exposure effect. You can also try HDR or even stitch together a panorama for breathtaking impact.
Conclusion
Remember to watch out for those common pitfalls. Keep your post-processing workflow sharp. Whether you’re aiming for a subtle touch of reality or a bold artistic statement, the power is in your hands. Now, go out there and capture the stillness of time with your camera—your next masterpiece is just a click away.
Frequently Asked Questions
What is long exposure photography?
Long exposure photography is a technique that involves using a slower shutter speed to capture the movement of subjects, such as stars or flowing water, over time. This technique helps create a dramatic, ethereal effect in photos.
What are common mistakes in long exposure photography?
Common mistakes include leaving the vibration reduction system on, not using mirror lock-up, not employing a graduated neutral density (GND) filter, setting the aperture to f/22, overlooking ISO adjustments, shooting without considering outdoor elements, opting for low-quality filters, underestimating wind, not covering the viewfinder, and misplaced trust in filter vendors.
How should I edit long exposure photos taken with a mirrorless camera?
Start by shooting in RAW, then proceed with post-processing steps like cropping and straightening, exposure correction, color control, detailing, and applying any creative filters or adjustments. The approach depends on the desired outcome, from minimal adjustments for realism to creative effects like HDR or panoramas.
Why is shooting in RAW important for long exposure photography?
Shooting in RAW is crucial because it captures a wider dynamic range and more detailed information, providing greater flexibility during post-processing. This allows for more precise adjustments in exposure, colors, and details.
What post-processing style is recommended for long exposure photos?
The recommended post-processing style varies based on your artistic vision. Options range from minimal adjustments to maintain realism, to more dramatic changes like heightened contrast and saturation, conversion to black and white, or experimental effects such as double exposure or HDR.